
Photo booths can spice up any party, but you don't need to pay a fortune to rent one for your next event. With this budget-friendly photo booth tutorial, you can set up the perfect scene for snapping memorable shots. Just follow these steps to complete the project.
Materials:
- Measuring tape
- Pencil
- Painter's tape
- Crepe paper streamers
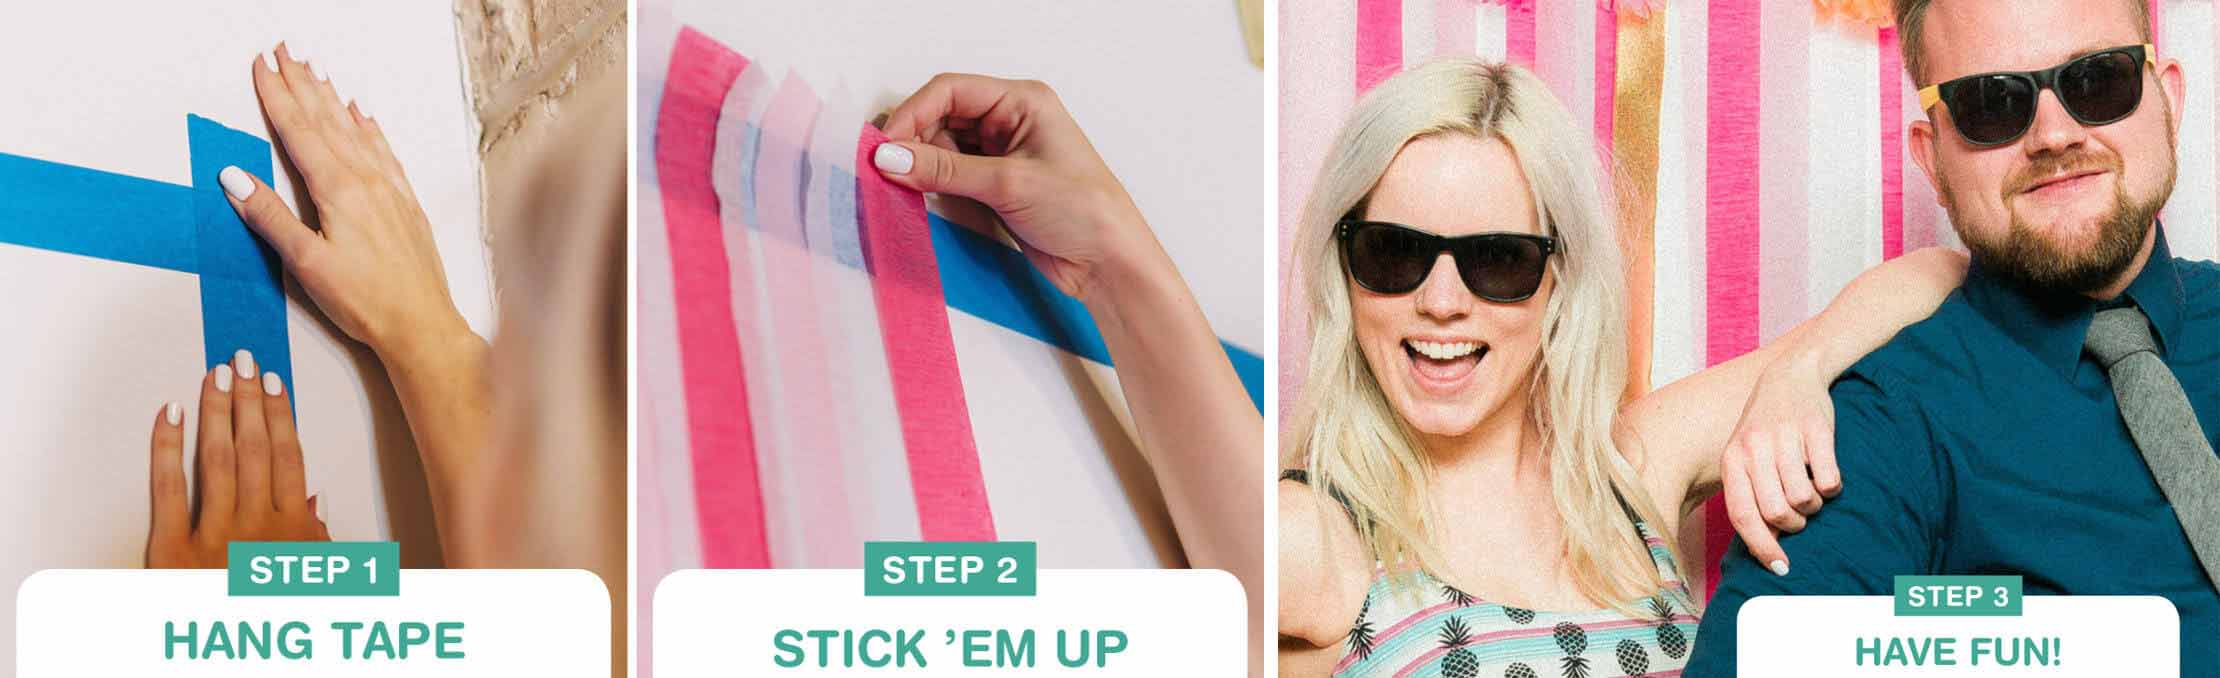
Step 1. Tape it up.
Find a blank wall and measure up 7 feet from the floor. Place a pencil mark at the spot. Measure out 8 feet of painter's tape and cut. Apply the tape horizontally to the wall at your mark, keeping the sticky side out.
Step 2. Spice it up.
Cut the crepe paper streamers into 7-foot strips. Choose colors that will match the color scheme of your party. Stick the streamers to the tape, overlapping slightly. Continue to cut and hang until you have completely covered the wall. You can add a bunting or garland to the setup. If you have a little more room in your budget, order a custom Banner from Walgreens with the date of your party to include in the mix.
Step 3. Snap some shots.
Place some accessories and props in the photo area and you're ready to go. Encourage guests to visit the photo booth and capture the fun.
Step 4. Print photos.
After the party ends, head to Walgreens Photo to order Prints. Have doubles made so you can send along a copy with each of your thank you notes.
There you have it – a photo booth fun that's as easy as 1-2-3-4! Grab the necessary Photo products today with FREE Same Day Pickup and get ready for some photoshoot fun.