How To Make A DIY Photo Ornament
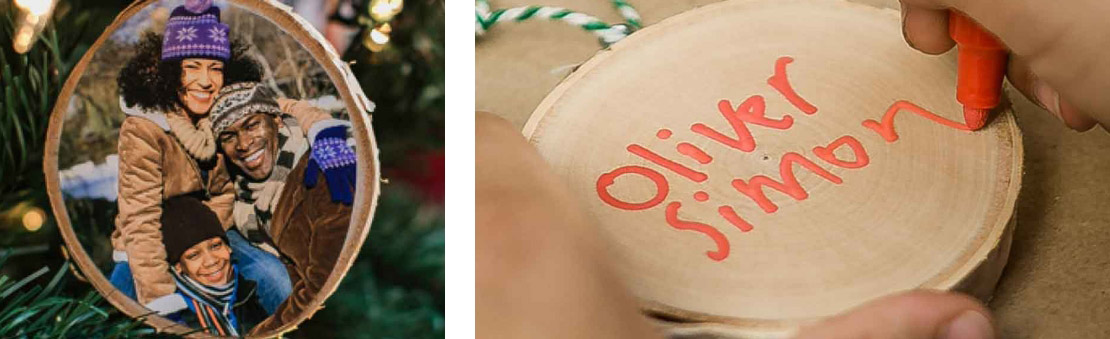

Looking for a fun, easy craft project to get your little one in the spirit of the season? Just follow these steps to help your child create a one-of-a-kind ornament to proudly display on the tree.
Materials
Wood round (available at most craft stores)
Black ink pen or marker
Scissors
Decoupage glue (also available at craft stores)
Sponge-tipped brush
Eye hook
Decorative twine
1. Select a photo
Have your child select a picture to display on the ornament. For best results, choose 4x6 Prints where the subjects are closely gathered.
2. Trace the shape
Help your child cut out the image. Keep the scissors just inside of the lines to avoid getting any of the black in the image.
3. Trim
Help your child cut out the image. Keep the scissors just inside of the lines to avoid getting any of the black in the image.
4. Stick
Stick Use a sponge tipped brush to spread a thin layer of decoupage glue all over the wood round. Place the picture over the top and press to adhere the picture.
5. Seal
Spread another layer of decoupage glue over the top of the photo with the brush. Be sure to smooth away excess glue, so that there is an even coating over the photo. Allow the ornament to dry completely.
6. Add the hanger
Insert an eye hook into the wood and twist to screw it into place. You may need to help your child with this step.
7. Tie
Use the scissors to cut off about 5 inches of twine. Thread it through the eye hook and tie into a knot.
8. Display
Let your child choose a branch and hang the ornament.
Kids of all ages can complete this fun craft project with a little help from parents. Make a collection to hang on the tree or to give as gifts for the holidays. Start by ordering your 4x6 Prints today.